Tommy Caldwell and Kevin Jorgenson have undertaken one of the most ambitious climbing projects ever conceived - to free climb El Capitan's Dawn Wall. Tommy began the project in 2007 and enlisted highball boulderer and Bishop denizen, Jorgenson, soon thereafter to share in the project.
The climb includes 7 pitches of 5.14 and 7 pitches of 5.13 amongst a total of 28 pitches, and wanders across the Dawn Wall connecting parts of Mescalito, Adrift, Reticent, and Warren Harding's famed Wall of the Early Morning Light.
The scale, difficulty, and sustained nature of the project is mind-boggling.
Tommy recently shared on his blog that he'd used a modified CrossFit workout to help train for the project. It's called 'Cindy' and is a routine whereby you do as many sets of 5 pull-ups, 10 pushups, and 15 situps as you can in 20 minutes. Tommy was able to do 26 sets in the alloted time...
How many can you do???
Saturday, December 17, 2011
Friday, December 16, 2011
Favorite Hikes & Bikes: Bay Area

Batteries to Bluffs Trail (0.7 miles): Begin at the Golden Gate Bridge and hike South until you reach the Batteries and Bluffs trail(about a quarter of a mile).You will be hiking above North Baker Beach (aka Marshall's Beach) which is a somewhat popular nude beach. The descent to the beach along the Batteries to Bluffs trail used to be a bit more fun as it was steep and rugged. Wooden planks and stairs were installed in 2007 as part of a large renovation project that also included the removal of trees for the nefarious purpose of 'historic view preservation', but I digress. You can descend all the way to the beach (optional) or continue along until you the trail meets back up with the road.

Land's End Trail (~3 miles): From Baker Beach, take steps at the Southern end of the beach up into the majestic Sea Cliff neighborhood. From here walk through the neighborhood keeping as close to the coast as possible. An amazing and eclectic assortment of homes here provide a feast for the eyes until you are back on the trail. At the end of the neighborhood you will run into the sign for the Land's End Trail. Take this trail all the way to Sutros Baths and Ocean Beach for amazing views out over the Pacific Ocean, the Marin Headlands, and the Golden Gate Bridge. The trail is mostly flat with a few steeper sections that are outfitted with wooden stairs. There is also an optional turnoff down to Mile Rock Beach.

I highly recommend this! The stairs lead down to the beach itself and also a human made rock maze on a rock promontory. Rejoin the main trail and follow it until you reach the site of the old Sutros Baths.

The Sutros Baths were built by former mayor Adolph Sutro in 1896 as a privately owned swimming pool complex that included seven pools, six of which were salt water and one freshwater. A fire in 1966 burned the original structure down and the ruins were left as a point of interest. Explore the Baths and walk through the tunnel at the Northern end for a short, cool adventure.
Above the Sutros Baths sits the Cliff House restaurant that forms the North end of Ocean Beach. First built in 1858 with lumber salvaged from shipwrecks that happened on the rocks below it, the structure has seen a number of changes. It is now a charming and somewhat expensive place to eat that is mostly a tourist destination.
On the hill above the Cliff House was the site of the home of Adolph Sutro. The foundation of the home is still in place and this area provides an excellent place from which to view Ocean Beach, the Outer Richmond, and Golden Gate Park.

A block or two off of Ocean Beach is a Safeway grocery store. From here a number of buses lead to destinations throughout the city. Tired hikers can use these buses to return back to the start of the hike. Those with the time and stamina however are encouraged to hike through Golden Gate Park, have tea in the Japanese Tea Gardens, and finish up with a meal in Haight Ashbury for the full circuit!

Downtown SF - Golden Gate Bridge - Sausalito: A perennial favorite. Ride your bike over the Golden Gate Bridge from anywhere in Downtown San Francisco to Sausalito. Enjoy a Mimosa or brunch and either pedal home or take the Sausalito Ferry back to San Francisco. 5.5 miles one way, or 11 miles round trip (from the GGB).
=
Favorite Hikes: Yosemite National Park
 Not just for world renowned rock climbing, Yosemite is also home to some of the best and most breath-taking hiking on Earth. Below is a short summary of our favorite hikes in Yosemite National Park grouped by area.
Yosemite Valley
4 Mile Trail: Ascending nearly 3,200 feet off the Valley Floor, 4 Mile Trail links hikers from near the base of Sentinel Rock in Yosemite Valley, all the way up to Glacier Point on the Valley's South Eastern side, this is surely one of the Valley's best and most arduous hikes. Distances are 4.7 miles one way, and 9.4 miles round trip. Some hikers prefer to take the hiker's shuttle from Yosemite Lodge (times: 8:30, 10:00, and 1:30 pm) to the top of Glacier Point and hike only back down to the Valley. Cost of the ride one-way is $25 for adults, $23 for seniors, and $15 for children. Tickets are available at the Yosemite Lodge tour desk. This hike offers spectacular views and a more pleasurable challenge than the Upper Yosemite Falls trail that climbs the opposite side of the Valley. The trail is less rocky, wider, and offers a gentler grade than the one that ascends to the West side of Yosemite Falls. Also, a bonus with 4 Mile Trail is the ability to see Yosemite Falls for almost the entire way up.

Upper Yosemite Falls Trail: 3.8 miles one-way, or 7.6 miles round trip and 2,600 feet of elevation gain make the Upper Yosemite Falls trail one of the main challenges for hikers visiting Yosemite National Park. Beginning with over 60 short and steep switchbacks up a rock-strewn trail beginning at the trailhead at the back of Camp 4, the hike immediately attempts to weed out those out of shape or unprepared. After these initial switchbacks, hiker's are greeted by the excellent view at Columbia Point. From here, approximately 1/3 finished with the hike, and nearly 1,100 feet off the Valley Floor, hikers can stand at the metal railing and take in sweeping views down both sides of the Valley, gaze at the towering majesty of Half Dome, and the fingernail size swimming pool in back of Yosemite Lodge. Not far from Columbia Point, the trail turns a corner and opens up a view of Upper Yosemite Falls. If early in the season, a fair amount of moisture/mist will rain down on hikers here as they move along the flattish path towards the base of the Upper Falls. Here a final round of switchbacks (many) lead up to the top of Yosemite Falls and fabulous views out over the Valley. Those with extra energy can continue on for another mile or so to Yosemite Point which looks out over Lost Arrow Spire and the Valley Floor. As always in Yosemite, bring much more water on these longer hikes than you think you need, plenty of snacks, and pace yourself.
 Vernal and Nevada Falls via the Mist Trail: 7 miles round trip to the top of Nevada Falls, and 1,900 feet of elevation gain. This is perhaps my favorite hike in all of Yosemite Valley. Ascending up the well-named Mist Trail, hikers are treated to direct views, and summits, of two water falls Vernal Falls (317 feet tall) and Nevada Falls (594 feet). Take the Mist Trail up the right side of Vernal Falls to its metal railing surrounded summit, then continue up past Nevada Falls on its left side to its summit. Take your time basking in your accomplishment, the suns rays, and gorgeous views of Liberty Cap before heading down. Descend via the John Muir Trail after crossing over the Merced River above Nevada Falls. This descent option is much easier on the knees offering a much reduced grade, and longer, flatter, and less rocky switchbacks on the way back down to the observation bridge below Vernal Falls. If it's early in the season or the water level seems particularly high, hikers may wish to have a poncho with them for Vernal Falls as the mist blowing off the Falls can completely soak through a hiker's clothes in minutes. Also, it shouldn't need to be said, but exercise extreme caution on the wet and rocky trails here. People have slipped and fallen to their deaths at various points along the trail. The exposure and level of objective danger are not unreasonable, but carelessness or allowing oneself to become dehydrated or distracted can and does result in serious accidents.
Half Dome: Now a permit-only hike, Half Dome's summit is reached via the famed cables that are located several miles past the top of Nevada Falls on Half Dome's South side. If you are able to reserve a permit very early in the year for a summit attempt on Half Dome, you will be one of 400 visitors that day to try to set aside fear and exhaustion to reach one of North America's (if not the world's) most famous hike-up to rock summits. The hike is nearly 18.5 miles round trip from Curry Village and culminates in an exposed hike up to the top of the sub-dome (very narrow, and slippery rock switchbacks to here), followed by steel cables for 400 feet to the Half Dome's summit. Many people have died on the summit cables from both accidental falls, lightening, and from sudden rain storms that caused the granite to become incredibly slick and dangerous. The Park Service is currently reviewing different ideas for making this hike less dangerous including the recently implemented permitting system which limits the dangerous overcrowding on the cables. This does not mean however that at peak times there will not still be a slow moving (or non-moving) congo line on the cables with fear stricken hikers who are unable to move up or down. This hike strikes me as unnecessarily dangerous (as each hiker is responsible for assessing thunderstorm risks, personal hydration, the competency of those around them, etc while already in an environment that is often foreign to them and while typically exhausted.) I can't honestly advocate this hike while comparatively safer and far less crowded gems such as North Dome and Sentinel Dome are available. That said, if you simply must do Half Dome be sure you can identify building storms (which come on extremely quickly in the Sierras), consider protection opportunities such as quick draws and a harness, bring way more water than you think you'll need, and be sure you are fit enough for this gruelling 18.5 mile, 4,800 ft elevation gain marathon. If so, have fun, but be very careful!
 Sentinel Dome and Taft Point and the Fissures: One of my favorite places to take visitors in YNP, these two Valley rim features offer more serenity than the more crowded hikes listed above, with a chance to see classic Yosemite views without the hordes of camera toting tourists (I know, I know...I'm one too!) Driving towards Glacier Point along Glacier Point Rd, park at a paved pullout on the left with perpendicular parking spaces and a concrete bathroom facility (come early to make sure you get a spot on crowded weekends!) Leaving the parking area, hike to the East for 1.1 miles along a well marked trail, and ascend the low angle slabs on Sentinel Dome's eastern side to its summit. Here, at 8,100 feet (also the second highest point overlooking the Valley Floor with only Half Dome being higher at 8,800 feet), you will be rewarded with 360 degree views of Yosemite Valley, Tuolumne Meadows, and the high Sierra to the East. This is truly one of the finest places in the Valley to relax and practice your photography! Retrace your steps back to the parking area, but continue past the cars for 1.1 more miles to Taft Point and the Fissures. Beware that the Fissures are incut rock chimney's that fall away several thousand feet to the Valley Floor. Keep an eye on the next step, not just through the view finder on your camera! Taft Point offers a metal railing for protection as you peer out over the edge and look down on El Capitan! After the hikes, finish off by driving over to Glacier Point for its classic views and a libation at the small gift shop and eatery.
 Approaching North Dome's Summit
North Dome:Park at the Porcupine Creek area on Tioga Rd (in Tuolumne Meadows, Hwy 120 E). From here hike 4.4 miles each way down the summit of North Dome. The crowds are even less a factor here than on Sentinel Dome and the views of Half Dome's face from directly across Tenaya Canyon and down through Yosemite Valley make this hike an absolute must do if the road through Tuolumne Meadows is open for the season. If you are early in the season, and the water is high, you may have to cross streams in certain places. This can be deadly. Make sure to find a safe area to cross (if inobvious from previous parties) and take your time.
Tuolumne Meadows Area
Pothole Dome: Park in the pullout off Hwy 120 Tioga Pass Road at the sign for Pothole Dome. Use a well worn path to cross the meadow to its base, and 3rd/4th class your way up the Dome's low angle shoulder. This is a really quick adventure, but is great fun. Its amazing what modern day, sticky rubber hiking shoes/boots can do on textured Yosemite granite. Trust your feet and make your way up to Pothole Domes summit for views sweeping out across Tuolumne Meadows.
 Vernal and Nevada Falls via the Mist Trail: 7 miles round trip to the top of Nevada Falls, and 1,900 feet of elevation gain. This is perhaps my favorite hike in all of Yosemite Valley. Ascending up the well-named Mist Trail, hikers are treated to direct views, and summits, of two water falls Vernal Falls (317 feet tall) and Nevada Falls (594 feet). Take the Mist Trail up the right side of Vernal Falls to its metal railing surrounded summit, then continue up past Nevada Falls on its left side to its summit. Take your time basking in your accomplishment, the suns rays, and gorgeous views of Liberty Cap before heading down. Descend via the John Muir Trail after crossing over the Merced River above Nevada Falls. This descent option is much easier on the knees offering a much reduced grade, and longer, flatter, and less rocky switchbacks on the way back down to the observation bridge below Vernal Falls. If it's early in the season or the water level seems particularly high, hikers may wish to have a poncho with them for Vernal Falls as the mist blowing off the Falls can completely soak through a hiker's clothes in minutes. Also, it shouldn't need to be said, but exercise extreme caution on the wet and rocky trails here. People have slipped and fallen to their deaths at various points along the trail. The exposure and level of objective danger are not unreasonable, but carelessness or allowing oneself to become dehydrated or distracted can and does result in serious accidents.
 Half Dome: Now a permit-only hike, Half Dome's summit is reached via the famed cables that are located several miles past the top of Nevada Falls on Half Dome's South side. If you are able to reserve a permit very early in the year for a summit attempt on Half Dome, you will be one of 400 visitors that day to try to set aside fear and exhaustion to reach one of North America's (if not the world's) most famous hike-up to rock summits. The hike is nearly 18.5 miles round trip from Curry Village and culminates in an exposed hike up to the top of the sub-dome (very narrow, and slippery rock switchbacks to here), followed by steel cables for 400 feet to the Half Dome's summit. Many people have died on the summit cables from both accidental falls, lightening, and from sudden rain storms that caused the granite to become incredibly slick and dangerous. The Park Service is currently reviewing different ideas for making this hike less dangerous including the recently implemented permitting system which limits the dangerous overcrowding on the cables. This does not mean however that at peak times there will not still be a slow moving (or non-moving) congo line on the cables with fear stricken hikers who are unable to move up or down. This hike strikes me as unnecessarily dangerous (as each hiker is responsible for assessing thunderstorm risks, personal hydration, the competency of those around them, etc while already in an environment that is often foreign to them and while typically exhausted.) I can't honestly advocate this hike while comparatively safer and far less crowded gems such as North Dome and Sentinel Dome are available. That said, if you simply must do Half Dome be sure you can identify building storms (which come on extremely quickly in the Sierras), consider protection opportunities such as quick draws and a harness, bring way more water than you think you'll need, and be sure you are fit enough for this gruelling 18.5 mile, 4,800 ft elevation gain marathon. If so, have fun, but be very careful!
 Sentinel Dome and Taft Point and the Fissures: One of my favorite places to take visitors in YNP, these two Valley rim features offer more serenity than the more crowded hikes listed above, with a chance to see classic Yosemite views without the hordes of camera toting tourists (I know, I know...I'm one too!) Driving towards Glacier Point along Glacier Point Rd, park at a paved pullout on the left with perpendicular parking spaces and a concrete bathroom facility (come early to make sure you get a spot on crowded weekends!) Leaving the parking area, hike to the East for 1.1 miles along a well marked trail, and ascend the low angle slabs on Sentinel Dome's eastern side to its summit. Here, at 8,100 feet (also the second highest point overlooking the Valley Floor with only Half Dome being higher at 8,800 feet), you will be rewarded with 360 degree views of Yosemite Valley, Tuolumne Meadows, and the high Sierra to the East. This is truly one of the finest places in the Valley to relax and practice your photography! Retrace your steps back to the parking area, but continue past the cars for 1.1 more miles to Taft Point and the Fissures. Beware that the Fissures are incut rock chimney's that fall away several thousand feet to the Valley Floor. Keep an eye on the next step, not just through the view finder on your camera! Taft Point offers a metal railing for protection as you peer out over the edge and look down on El Capitan! After the hikes, finish off by driving over to Glacier Point for its classic views and a libation at the small gift shop and eatery.
  Approaching North Dome's Summit
North Dome:Park at the Porcupine Creek area on Tioga Rd (in Tuolumne Meadows, Hwy 120 E). From here hike 4.4 miles each way down the summit of North Dome. The crowds are even less a factor here than on Sentinel Dome and the views of Half Dome's face from directly across Tenaya Canyon and down through Yosemite Valley make this hike an absolute must do if the road through Tuolumne Meadows is open for the season. If you are early in the season, and the water is high, you may have to cross streams in certain places. This can be deadly. Make sure to find a safe area to cross (if inobvious from previous parties) and take your time.
Tuolumne Meadows Area
Pothole Dome: Park in the pullout off Hwy 120 Tioga Pass Road at the sign for Pothole Dome. Use a well worn path to cross the meadow to its base, and 3rd/4th class your way up the Dome's low angle shoulder. This is a really quick adventure, but is great fun. Its amazing what modern day, sticky rubber hiking shoes/boots can do on textured Yosemite granite. Trust your feet and make your way up to Pothole Domes summit for views sweeping out across Tuolumne Meadows.

Lembert Dome: The classic dome hike in Tuolumne Meadows, Lembert Dome is the prominent sloping dome directly off the road near the Tuolumne Lodge area. The trailhead starts at 8,500 ft and ascends 900 feet to the thinner air summit at 9,400 ft. The hike is 2.8 miles round trip and ample parking is located at the trailhead. The trail leads hikers to the bare rock shoulder of Lembert Dome. From here slowly navigate your way to the small summit block, and carefully scramble up to the Dome's true summit using extreme caution to avoid sliding down the slabs. Excellent views of Tuolumne River and Meadows make for a terrific finish.
Wednesday, December 14, 2011
Castle Rock State Park - South Bay

Castle Rock State Park is home to some of the best sandstone bouldering in the United States. A large area with tons of boulder problems, a fair amount of bolted sport climbs, and some trad lines, Castle Rock in and of itself is enough material for an entire guidebook (of which there are several.)
Climbs here range from 10 foot boulders to 120 foot tall sport lines encompassing nearly every level of difficulty.
The park itself comprises 5,200 acres along the highest ridge in the Santa Cruz Mountains. There are over 35 miles of trails running through the park. Fortunately however, much of the very best climbing is within a mile or two of the main parking lot on CA-35.
Favorite Climbs:

The area known as the Waterfall Cliff provides a nice mixture of moderate sport and trad climbs and is a must visit if you are looking to rope up and have limited time. The area is located below the waterfall observation deck that is a 0.9 mile downhill hike from the main parking area.
The climbs here range from 5.6 to 5.11d, with the likely most popular moderate route being The Falls (5.10R) which ascends a bolted face up the left side of the waterfall just below the observation deck. It is 100' long and runout. There are 6 bolts - the first of which is approximately 15' off the drck - and the anchor is rigged using the observation deck supports. The climb can be top-roped with a 70 m rope or by using long slings off the observation deck.
To the right of the falls is the very fun Charlie Solo (5.6, Trad, 45') that ends at a two bolt anchor. The climb is a lieback with plenty of protection opportunities. One of the bolts was substandard and loose the last time we were there. A tree at the top can be used to supplement the bolts using 15-20' of webbing.

To the left of Charlie Solo is The Greeboo (5.9, Sport, 45'). The climb ascends past 3 bolts to a two bolt anchor which is shared with Charlie Solo. Fun slabby face moves make this an enjoyable climb, but it is slightly run-out. The bolts can be supplmeneted with a few pieces of trad gear in the crack to the right or in a pocket midway through the climb.

On the far right side of the wall is Putrefaction (5.11a, Sport, 75') that ascends past 4 bolts to a two bolt anchor. This climb is tenuous face climbing up featured sandstone. It can be top-roped by walking across the rocks at the top, although reaching the bolts is a bit sketchy as they are on a downward slopping summit.

Lastly, just right of Putrefaction is Degeneration (5.10a, Sport and Trad, 70') which begins with a 5.6 dihedral that protects well with stoppers and small cams for approximately 40'. The climb then traverses out onto a slab face with 3 bolts leading to a two bolt anchor. Here again the climb can be top-roped with the anchors being much easier to reach than those for Putrefaction. Unfortunately however, one of the bolts was loose the last time we climbed here. It was both no longer fully driven and had a loose hangar.

To reach these climbs hike towards the observation deck. Approximately 40' from the deck itself there is a metal sign reading 'Danger Sheer Cliff Stay Back.' Turn left here and cross the stream and follow a faint trail steeply uphill for 200 feet or so. Follow the trail to the right until you reach the tops of the above climbs. Here you will see a gully that runs down to the base. Carefully descend the slabs and you will see the bolted routes on your right.

Directions: From San Francisco, take I-280 South to exit 24 Sand Hill Rd toward Menlo Park. Turn right on Portola Rd, left onto Ca-84W/La Honda Rd, and another left onto CA-35 S/Skyline Blvd. Approximate drive time is 1 hour and 20 minutes.
Fees: There is an $8 day use fee.
Special Considerations: Avoid climbing for several days (minimum should be two) after it has rained. The sandstone here is very fragile and critical holds on well loved problems have been known to break. There is also a fair amount of Poison Oak throughout the park and visitors should keep an eye out for both Western Rattlesnakes and Mountain Lions.
Mt. Tamalpais

View from Northern Formation
High above the San Francisco Bay, Mt. Tamalpais, at 2,574 feet, is the highest point in Marin County and stands sentinel-like at the mouth of the bay. From the parking area at the top, Mt. Tam offers some decent rock climbing with world class views. While the rock here is somewhat chossy, the setting makes it a worthwhile place to climb even if only once.
Geology: Serpentine (much like that found at Stinson and Mickey's Beach).
Directions: From San Francisco, take the Golden Gate Bridge North into Marin County. Use the exit for Stinson Beach/CA 1. Turn left on Shoreline to stay on CA-1N. Then turn right on Panoramic Hwy. Follow the signs to Mt. Tam and continue on to the summit parking lot.
Cost: Day pass parking at the summit is $7.
Approach: You will see several main rock formations from the loop hike at Mt. Tam's summit. It is easiest however to take the plank trail up to the lookout tower and approach the rock routes from above. (If it is your first time climbing at Mt. Tam, it helps to hike the loop once to view the formations from below, thus allowing easier navigation when coming from above to set up TR anchors.)
Routes range in difficulty from 5.7 to 5.11b (for the famed Oberman roof crack) with most of the routes in the 5.7-5.8 range. Top ropes here require trad anchors and slinging chockstones. Bring long webbing and cams for most anchors. There are a few very rusty quarter inch buttonhead bolts from a different era atop several of the climbs. DO NOT USE THESE BOLTS! They are no better than coffin nails!
While not the best climbing, you can't really find better views while cragging in the Bay Area (except for Mickey's Beach perhaps!)

Olberman's Crack

Northern Formation
Tuesday, November 8, 2011
Yosemite National Park

Yosemite National Park is perhaps the mecca of worldwide rock climbing. Featuring towering granite walls, beautiful Sierra scenery, and amazingly short approaches, Yosemite is both the birthplace of modern rock climbing, and also home to some of the world's most famous routes.
Located just four hours east of San Francisco, Yosemite National Park sees almost 4 million visitors a year. While many rightly complain that it turns the several square mile Valley floor into an unholy zoo, it takes but a small bit of either hiking or climbing to leave the crowds far below and enter into the spiritual sanctum that is one of the world's most beautiful natural settings.
Directions: From San Francisco, take 580-E to 120-E all the way to the Valley Floor. The drive itself is approximately four hours long, but requires motorists to suffer on congested highways for only the first hour and a half. After that, the roads are of the one and two-lane variety, and actually make for a nice, relaxing drive amongst ever-improving scenery as you approach the Valley.
Where to Stay: There are many options for lodging in Yosemite, but navigating through the choices can be something of a pain. Below is a breakdown of the various lodges and campgrounds and approximate prices for each (although the pricing is variable depending on the season and the demand.)
First and foremost is Camp 4, the 'climbers' campground,' located just west of Yosemite Falls. Camp 4 is recognized as one of the world's three most famous base camps, with Chamonix and Everest Base Camp being the other two most notable operations centers when it comes to famous climbing achievements.
The campground itself is rather plain with open campsites and picnic tables spread out over a few hundred yards. Its charm comes mainly from its location in the Valley, as well as its astounding history. In 1997, the Park Service planned to develop an employee housing site over historic Camp 4 after severe flooding destroyed much of the housing, but were stopped when legendary climber Tom Frost led an effort to secure Camp 4 on the National Register of Historic Places for, "its significant association with the growth and development of rock climbing in the Yosemite Valley during the 'golden years' of pioneer mountaineering." During the '60s, '70s, and '80s, many of the country's (if not world's) best climbers made Camp 4 their semi-permanent home. The lax approach to enforcing camping limits and the Valley 'dirtbags' willingness to live for months at a time in the dust and dirt of Camp 4 was perhaps one of the critical factors in allowing climbers to push the standards higher and higher as a constant commitment to climbing and the climbing lifestyle allowed these denizens of the Valley to squeeze out every last drop of talent.
Camp 4 is a walk-in campground and thus reservations are not available. To secure a site, one must arrive early (pre-8 am) and wait in line at the ranger station located just inside the camp. Depending on availability, climbers can stay here for $5/night per person (a total of 6 people allowed in each campsite) for up to 14 days per year. The campground is open year round, has community bathrooms, and no showers. If a shower is desired, one can shower at Curry Village for a cost of $2.
Lastly, despite its lack of accoutrements, Camp 4 offers dozens of classic bouldering problems, including the famed Ron Kauk FA, Midnight Lightening, on the Columbia Boulder located in the middle of the campground. While officially V8, it is regarded as much harder than that now given the amount of polish the holds have undergone after a few decades of visiting climbers testing themselves on this, the world's most famous boulder problem.
 Midnight Lightning
Curry Village: Curry Village is one of my favorite places to stay in the Valley. Open all year long, it features canvas covered tent cabins offering guests several options including heated or non-heated tents, 'Signature' cabins that have wooden walls or the standard canvas covered tent type cabins, and also a number of all wood cabins that include their own private bathrooms, but typically must be reserved months and months in advance. Each tent cabin includes several cots equipped with pillows, sheets, and wool blankets. Also provided are towels for the community showers. Curry Village offers several dining options for guests including the ever-popular pizza deck, a tacqueria in the warmer months, an indoor bar and grill, a buffet, and a coffee shop for bagels and various baked goods. There is also a small grocery store where visitors can pick up snacks, drinks (including beer, wine, and liquor), and other sundry items.
Reservations for Curry Village can be made at the Yosemite National Park website: www.yosemitepark.com/plan-your-visit.aspx.
Prices range from $40 for the unheated tent cabins in winter, up to $100(ish) dollars in the busy summer months.
 1921 Promotional Poster
Housekeeping Camp: This area is located along the Merced River in the center of Yosemite and while more rustic than even Curry Village, it offers a great deal of charm given its river bank setting, its large group feel, and due to the fact that guests here are allowed to have campfires (which are only allowed at a few places in the Valley.) The 'rooms' are really three-walled structures with cots much like those found in Curry Village. Each unit has a private picnic table and fire pit near the entrance to the unit, with small stick fences delineating the space. Guests are directed to drive up to, and park directly in front of, their units allowing for easy unloading for the scores of families and other large groups that bring cooking equipment, coolers, rafts, and bicycles to the park for what are typically longer stays. Its not unusual to see guests hang chili pepper lights around their encampment and I've also seen movie projectors set up with kids seated around watching Disney movies under the stars in Yosemite. This is a real gem of a location and reservations should be made several months in advance using the Yosemite Reservations website: www.yosemitepark.com/Accomodations_HousekeepingCamp.aspx.
Reservations are typically $75-$130 per night. Housekeeping Camp offers no eateries of its own, but does feature a small gift shop with groceries and firewood. For hot food, guests can make the short (<1 mile) walk to the restaurants at Curry Village.
 Housekeeping Unit
Yosemite Lodge at the Falls: This lodge can best be described as a typical hotel. Each room offers comfortable beds, private baths, and even televisions (why on earth you'd watch television in the world's most beautiful place is beyond me, but its there if you'd like to use it.) The rooms are not particularly fancy, but are ideally situated near Yosemite Falls. There are several dining options available including a food court with a wide range of self-serve items, a fancier restaurant called the Mountain Room, a bar called the Mountain Room Lounge, and a small grocery. The Lodge, like Curry Village, also has an outdoor pool that is open during the warmer months. Average prices range between $120-$200 per night depending on season and demand.
The Ahwahnee Hotel: Exorbitantly expensive, but rumored to be worth every penny, the Ahwahnee Hotel was originally built as a way to draw influential and wealthy people to the nation's more breathtaking natural sites in order to garner their support for the concept of the National Parks. Located on the Valley Floor east of Yosemite Lodge, the Ahwahnee offers luxury accommodations and dining in the fabulously designed four star hotel. Prices range from $330-$500 depending on season and demand.
 Ahwahnee Hotel
There are several other campgrounds in and around Yosemite, but generally must be reserved up to a year in advance. For further details and booking information, please see: http://www.nps.gov/yose/planyourvisit/campground.htm.
When to Go: Yosemite is breathtaking no matter the season. In fact, some of the best times to visit the Valley are in the colder months in late Fall and early Winter. But, if you are limited to just one or two trips a year, the following breakdown of seasons, conditions, and available activities should be of interest.
Spring: Warm days and cold nights punctuate this season. The Park is somewhat uncrowded in the Spring offering a chance to enjoy the Valley without all the hustle and bustle. On the plus side, the waterfalls are typically peaking in late May/early June, so if you are visiting to see peak water conditions or take photographs this might just be the ideal time to plan your visit. On the downside, much of Valley's granite walls are streaked with water from the dozens of seasonal cascades that fall from the high Sierra as the snow begins to melt. Plan on climbing on the Park's shady south side if visiting in Spring, or on any of the Park's hundreds of boulder problems.
Summer: By mid to late June, the temperatures and crowds both begin to skyrocket making climbing a sweaty chore, and navigating the available eateries, roads, and parking lots a nightmare. That said, the long days, mild nights, and warmer temps give visitors a chance to swim in the Merced River (use extreme caution!) or take a raft down the river (rentals available at Curry Village), swim in the man-made pools, and enjoy much longer hikes without the risk of getting caught benighted. If its too hot to climb, do what many Yosemite veterans do, and head to Tuolumne Meadows where the temperatures are much more mild and try your hand at run-out climbing up knob covered slabs.
Fall: Big wall season. Climbers flock to the Valley in the Fall, when the cooler days provide the best possible friction on Yosemite's glacier carved walls. Camp 4 is usually at its peak occupancy in the Fall, so make alternative plans in case there is no availability. You are likely to see many famous wall climbers tramping around the Valley and its a great time to lay in El Cap Meadows with a pair of binoculars to watch those brave souls as they work their way up the Big Stone! This is also the ideal chance to try and send some of those frustratingly slick boulder problems in Camp 4, below Sentinel, at the Ahwahnee, or in Curry Village.
Winter: While usually snow covered throughout the Winter, the Park Service does an excellent job paving the roads. Check the national park website for updated road conditions including chain conditions. I've traveled to Yosemite dozens of times in Winter and must say that it is one of my favorite seasons. The snow covered Valley, free of tourists, is paradise found! Opportunities for climbing depend on how cold the rock is. Its usually best to gravitate to the Park's north side as it gets the most sun in Winter and offers the best opportunities to go bouldering and the like. The rock can be very cold though, so consider a snowshoe trek followed by a hot toddy in the Mountain Room Lounge should you find it too cold to climb.
Route Suggestions: There are literally hundreds, if not thousands, of established routes in Yosemite. There are many guidebooks available that should be used as a reference upon arrival in the Valley. In the meantime though, I'll provide a few suggestions for single pitch (or short multipitch) moderates that have stood the test of time as absolute must do classics, especially for newer leaders.
Sunnyside Jamcrack P1 (5.7). Sunnyside Jamcrack is just East of the bridge below Yosemite Falls. Perfect hand jamming takes the leader up to a comfortable ledge that has bolths that can be used to set up top ropes for the thin, Lazy Bum (5.10d) and Bummer (5.10c). Often crowded, its best to arrive early or later in the evening if hoping to climb Sunnyside Jamcrack otherwise prepare to wait in line. A standard rack with a few #1s and #2s should suffice for most leaders. The only better jamming I've ever found is on Double Cross in Joshua Tree (5.8.)
 (L-to-R) Bummer, Lazy Bum, Jamcrack
Lemon (5.9): Just left of Bummer is the flake route, Lemmon. While much too short, and a bit awkward to place gear, Lemon is a very enjoyable route, that I highly recommend.
 Lemon 5.9
Another great area for beginner to intermediate climbers is the Swan Slab area at the East end of Camp 4. Here, its possible for a competent leader to set up a large number of top-ropes. The only rub is that this area is commonly used by the Yosemite Mountaineering School for their guided classes. So, just like the Jamcrack area, plan to climb here either during the week, or very early/late on weekends.
A few classics in the Swan Slabs area:
Grant's Crack (5.9): A somewhat difficult lead due to the thin and somewhat liebacking nature of the cracks, this is a very fun and challenging route that ends at a prominent tree above.
Penthouse Cracks (5.8-5.10+): Located at the West end of Swan Slabs there is a prominent slab with various 5.6-5.8 routes that can be top-roped using a tree/flake/crack at the top of a wide and flat platform of rock that is accessed by walking up and around the left side of the slabs. Above the platform are the penthouse cracks that can be top-roped off of a two bolt anchor. To reach the bolts for these cracks, ascend 3rd-4th class up the left side (not very exposed but obviously, as is always the case when scrambling, can be quite dangerous). The Penthouse cracks are great fun, offering three (or four) routes off the same top-rope. This area is also somewhat less crowded than the main Swan Slabs area.
 Penthouse Cracks
Pot Belly (5.8): Located at Knob Hill, this 5.8 crack route (with several variations) can be top-roped off gear anchors (several cams using cracks at top of route). The top can be reached by walking up on the right hand side. Knob Hill is found by parking in the pullout just past Cascade Falls off 120 after the Valley First comes into view. Take a climbers trail just right of the bridge over the falls up for 10 minutes or so until you see the route.
 Pot Belly
 We will continue to update Yosemite with route information and hope that our readers will continue to share trip reports and favorite Yosemite Routes with us!

Tuesday, October 11, 2011
1st Annual Meyers Climbing Competition Video
Check out this cool video from the 1st Annual Meyers Climbing Festival! This was made by a cool climber we met that day as we made our way through the excellent boulder fields of South Lake Tahoe!
Make sure to pay special attention early on to the young kids (0:41) who are already pulling down hard!!!
Monday, September 26, 2011
Trip Report: Yosemite Facelift 2011

On Thursday night, our crew assembled at an apartment in San Francisco with well laid plans for a night of revelry before an alpine start up to the Valley on Friday morning. We went out, had a few drinks, a few laughs, and then headed back for a fitful night's rest - all of us reporting the next morning that our Quake City bivy had been difficult due to the rumblings of excitement we were all feeling.
We awoke, had a quick breakfast of bagels and coffee, and hit the ground running at 0' dark thirty.
Our friends Jeff and Mandy (see Stinson Beach and Tahoe trip reports), were joining Thuy and I for a weekend of climbing and picking up trash as part of the Yosemite Climbing Association's 9th Annual Yosemite Facelift, where climbers and friends work to rid the Park of waste. It would be Jeff and Mandy's first Facelift, and Thuy and I's second. And while Mandy had been to Yosemite before, this would be Jeff's first pilgrimage to what is one of, if not the, mecca of world rock climbing.
Passing the turnoff for Foresta, I began to pay close attention in the rear view mirror to Jeff's facial expressions. I knew that he would soon get his first glimpse of the Valley, and being that he is a climber with a deep love of crack climbing in places like Joshua Tree and Cochise Stronghold, I knew he was about to recognize this granite paradise for the Shangri-la that is is. Sure enough, he began hyperventilating at Tunnel View and caused one of our group to earnestly suggest to him he take deep breaths and try to avoid panicking!

We ditched the car and made a beeline for the Penthouse Cracks, a row of four cracks that begin off a large flat granite balcony thirty feet or so off the Valley floor at the far edge of Camp 4. We took turns top-roping each of these lines, repeatedly exclaiming how incredible the rock quality is, offering perfect hand and finger jams, difficult and thought provoking foot work on glacier polished granite, and having that special characteristic of some climbing mediums and routes that offer up holds or stances exactly where necessary but seemingly no where else...As if the geological process had taken place with future human climbers in mind!


Climbing in a light sprinkle, we thought we heard some thunder and decided to pack it in and run a few errands before the great Jim Donini's presentation in the East Auditorium that was one of the week long Facelift's evening events.

We arrived early and after wandering around star struck by many of the luminaries of Yosemite's amazing climbing history, we took our seats and listened as Jim Donini told us about first ascents in Patagonia and Alaska, his epic with Jeff Lowe, Michael Kennedy, and George Lowe on Latok I, and about his most recent adventures to Tajikistan and Iran. We also noted how unique and interesting it was to hear about his first ascent of Torre Egger in Patagonia with John Bragg and Jay Wilson, where they had found much of Maestri's gear on the way up, but how it stopped short of even the Col of Conquest, and how therefore, Donini, once a Maestri believer (more it would seem out of a standard ethic of believing another climber at his or her word, rather than questioning everything and becoming embroiled in the ensuing controversy), could no longer accept the Italian's original reports of successfully summitting Cerro Torre.

The next day we went to Sunnyside Bench where we found the classic two-pitch Sunnyside Jamcrack (P1, 5.7; P2 5.9) route jammed up with a queue of waiting climbers. Instead of waiting idly, Jeff jumped on the lieback flake route, Lemon (5.9), and set up a top rope. Thuy, Mandy, and I each climbed this less somewhat less popular route and loved every second of it. If it was only longer I'm certain more climbers would find this route to be a classic!


We then climbed on the .10d and .10c cracks between Lemon and Sunnyside Jamcrack, where Thuy turned in an awesome performance by hanging in there and completing the difficult lieback section at the end of the .10d!


We took turns on Jamcrack and then packed up and went to check in at the Facelift stand as volunteers.

We were armed with our litter sticks and trash bags just before a violent lightening storm and heavy rain hit the Valley. We waited out the rain and in the evening went for a short hike to the Indian Caves and the nearby boulders before turning in for the night.
We awoke Sunday morning and spent a few hours scrambling around in the Lower Yosemite Falls amphitheater and drainage finding hats, water bottles, food trash, steel cables, and even two shoes! We had a blast doing this and as a group hauled out 16 pounds of trash. We were disappointed that we weren't able to volunteer more, as in 2009 when we volunteered for five full days, but felt great that we were able to participate at all and each of us related to the others the psychic bounty our efforts bestowed upon us. I for example, while staring deep into the meadow grass along the road looking for trash realized suddently how beautiful these meadows are in their own right, whereas on all these trips over the years, I'd overlooked them (quite literally) as my gaze was affixed higher on the Valley's towering walls.

We dropped off our haul, and went to Camp 4 for one last bit of climbing where Jeff made short work of Grant's Crack, a fun, thin 5.9 set of parallel finger cracks that curves up and right to an anchor at a tree.
Jeff and I headed back and got into the car to head home, but not before giving serious consideration to the idea of sending Mandy and Thuy home with the car, forgetting our more urbane responsibilities, and staying in the Valley until further notice. Prudence got the better of us this time, and we settled for plans to come back in a week.
Many thanks to Ken Yeager and the rest of the Yosemite Climbing Association and Facelift volunteers for working so hard to keep the Valley clean and beautiful and for the incredibly special evening programs. Thanks also to my companions for such a wonderful trip!

Tuesday, September 20, 2011
Joshua Tree National Park
Joshua Tree National Park
Joshua Tree National Park is a virtual climber's paradise. 1,235 square miles in size, Joshua Tree, declared a National Park in 1994 as part of the California Desert Protection Act, is home to (by some estimates) greater than 5,000 established rock climbs.
The rock, a highly textured, large grained granite called monzonite, leaves fingers painfully raw, but provides some of the most excellent friction and feel of any rock I've ever climbed.
Driving into the Park's west entrance from the town of Joshua Tree off Twenty Nine Palms Highway, visitors are immediately confronted by the overwhelming beauty of the Mojave Desert that makes up the parks western half. The Mojave Desert is a 'high desert' or one that is at an elevation of greater than 3,000 ft. Here the desert is not only replete with the Park's namesake Joshua Tree's which rise as high as 15 meters, but also with thousands upon thousands of boulders and smallish rectangular formations littered with cracks strewn in heaps across the landscape. If you are visiting the park to climb, this should elicit in you a near panic level exuberance. If not, you should probably just turn back and attempt to hock your shoes for pocket change.
A few side notes on flora and fauna
Joshua Trees, beautiful and otherworldly, are actually not trees at all but giant Yucca plants. Yucca brevifolia have no growth rings and are therefore difficult to date, but it is estimated that they live for hundreds of years. The plant was given its name by Mormon settlers who crossed the Mojave Desert in the mid-19th century who saw in the tree the Biblical image of Joshua reaching with his hands in prayer towards the sky.

The high desert has more precipitation than the low Colorado Desert in the park's eastern half and offers visitors views abundant wildflowers in the spring as well as a bevy of various types of cactus and shrub.
Wildlife is also abundant in Joshua Tree, the park home to six species of snakes (be careful when scrambling on and over rock formations and keep an eye on the next step!), coyotes, tortoise, Desert Bighorn Sheep, tarantulas, and over 250 species of birds (including the Greater Roadrunner!)
Geology
The rock formations in Joshua Tree formed 100 million years ago as a result of magma cooling beneath the surface. Over time, groundwater has eroded away at the desert leaving exposed thousands of formations of similar height covered in cracks.

Where to Stay
Visiting climbers are drawn to the famed Hidden Valley Campground which is the first you will reach when entering the park's West entrance. Winter home to the legendary California climbers known as the Stonemasters, Hidden Valley Campground sits among and within walking distance of many of Joshua Tree's classics.
Hidden Valley Campground has 39 walk-in campsites that allow for up to 2 vehicles, 3 tents, and 6 people. There is a annual 30 day limit on camping in Joshua Tree, and a 14 day limit between the popular October - May time frame. It is often very difficult to get a spot if you arrive on a weekend in any other season but the usually too-hot-to-climb summer. For better luck, take a day off work and head down on Thursday instead. There is no running water, but several usually clean pit toilets. Each site has a picnic table, fire pit, and typically a nice, level area on which to pitch tents. If Hidden Valley Campground is full, try asking people already camping if you can share their spot. This is a not uncommon practice, and is actually a great way to meet new climbing partners. Just make sure to offer to buy a few beers for your hosts!

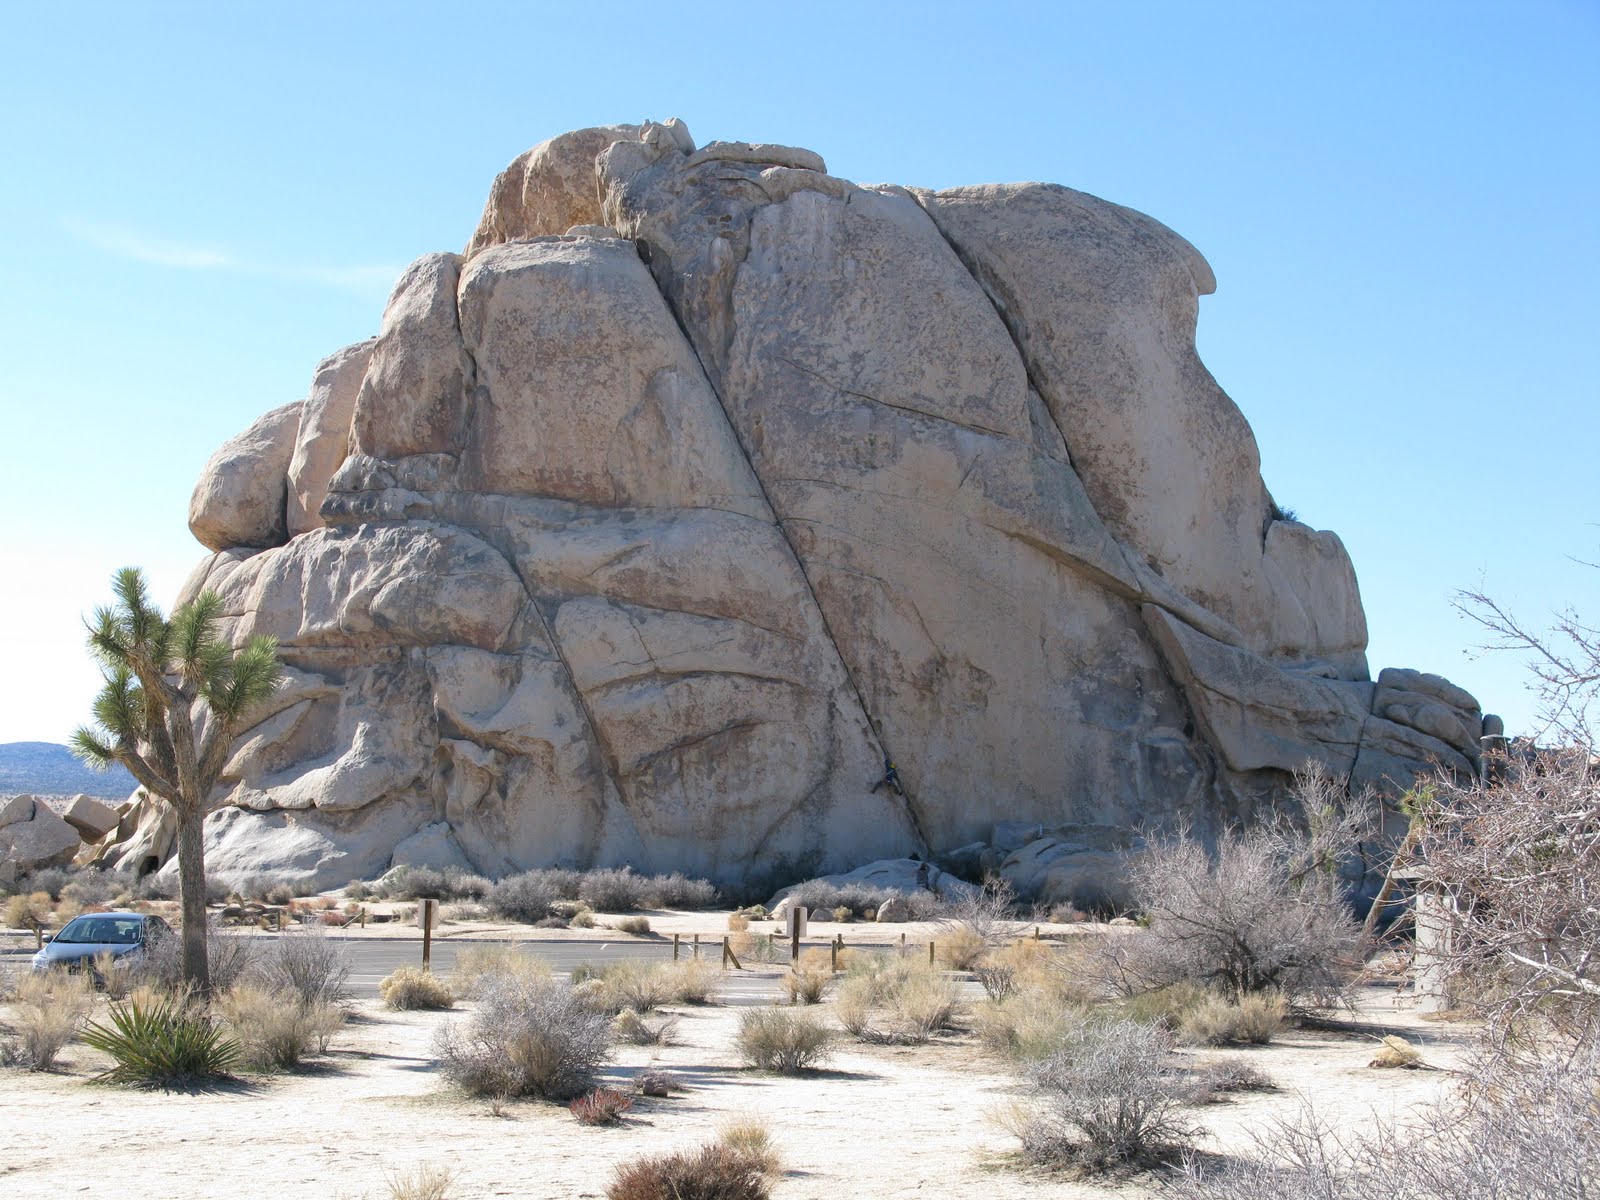
If you are the type of climber that prefers to stay in a hotel with running water, etc, you might check out the Joshua Tree Desert Inn in the town of Joshua Tree. This is the famous hotel where musician Gram Parsons (Flying Burrito Brothers, The Byrds, etc) died of an overdose in room #8. The room contains a stereo with a stack of Gram Parsons albums next to it, and a shrine out the door of the room where travelers and fans of the country/blues/folk/rock (according to a wikipedia article about the artist, this is called, "Cosmic American Music") musician can leave offerings. On my one stay there, several college aged girls twisted my arm into participating in a failed seance in the room where Gram passed. It was a tad unusual, but that's all part of the Joshua Tree experience!
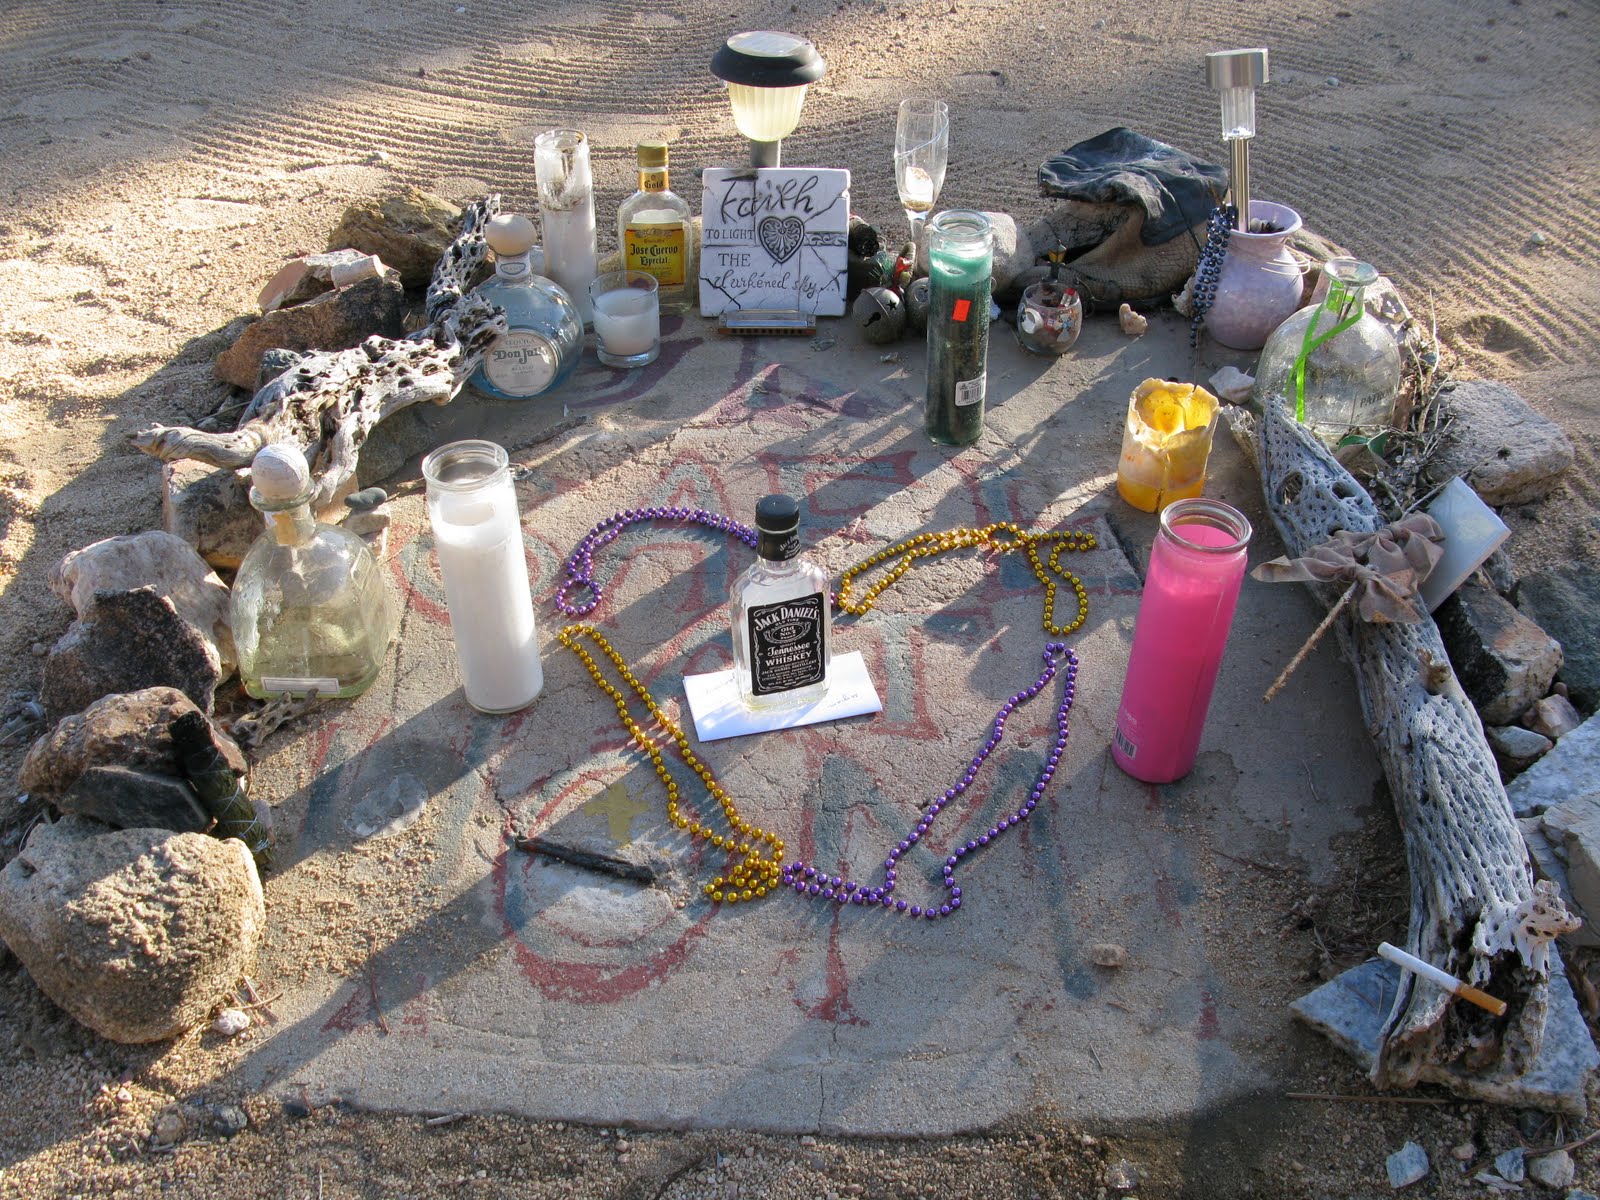
Interestingly enough, Gram's body disappeared from LAX, when road manager Phil Kaufman and a friend stole the body in a borrowed hearse, and drove the remains to Cap Rock in Joshua Tree (near Hidden Valley Campground) and cremated Gram's body according to the artist's wishes. As there is no law against stealing a dead body given that it has no intrinsic value (according to law), the body snatchers were given a small fine and released.
The hotel is currently managed by a great dreadlocked man named Marsu who makes homemade Chai tea for all his guests. If you'd like to see the room and shrine but aren't staying at the hotel, and Marsu still works there, its almost a given that he'd love to give you the tour. Stop on in and ask nicely to see the memorial and he'll probably make you some tea while you wander the grounds.
Food and Drink
In the town of Joshua Tree there is a giant Walmart where one can fill up on food, wood, and beverages cheaply. There is also a Pizza Place just outside of the Park called Sam's Pizza, where they serve not only serve Pizza, but also Indian food. They combine these two talents and make an 'interesting' curry sauce pizza that many climbers claim to crave at the end of a long day. I myself wasn't overly impressed by the curry pizza, but the regular pizza and other items are delicious. The same owners of Sam's Pizza also run a convenience store next door that sells firewood, alcohol, and snack foods.
Climbing Gear
Getting into off widths and need a few big bros? Run out of chalk or need tape for your shredded hands and fingers? Check out Nomad Ventures on the corner of Park Blvd and Hwy 62.
Showers
Showers can be found at Coyote Corner across the street from Nomad Ventures. Tokens for the shower are $4 and are good for 7.5 minutes of water.
Climbing Guides
Climbing guides are available through Joshua Tree Guides. They offer many different rates and packages. For more information, visit their website at http://joshuatreeguides.com/.
Directions from the Bay Area: Take 580 E to CA 120 E, then merge onto CA-99 S. Take 99 S to CA-58 E/Blue Star Memorial Hwy to I-15 N toward Las Vegas briefly before turning onto CA-247 S/Barstow Rd. Turn left onto CA-62 E/Twentynine Palms Hwy to Park Blvd. The drive takes approximately 9 hours, but I guarantee its worth it!!!
Favorite Routes
Hemingway Buttress
Feltoneon Physics (5.8)

This 100 foot tall trad line lies just off Park Boulevard approx 2 miles from Hidden Valley Campground. Park at the large pullout for Hemingway Buttress and hike towards the center of the wall. This climb starts approximately 40 feet to the right of the classic hand/fist crack, White Lightning (5.7). Featuring a wide crack/OW start in a right facing corner (that can be somewhat avoided by moving out onto the face of the buttress), the climb then ascends through excellent hand and finger cracks to a traverse below the summit, and a mantel up between two boulders. For a 100 foot line, this climb felt very adventurous given the heterogeneous nature of its features, its airy traverse (Note: leaders remember to protect your seconds by placing gear at the start and finish of the traverse!), and its mantel finish. Rappel off White Lightning with two ropes, or with a single cord approx 25 feet left of the climb (but note you will end up 7-10 feet off the ground and will need to downclimb easy face holds to complete the descent. I highly recommend this route!
Echo Rocks Area
Eff Eight (5.8)

This 40' Trad line feels like quite the sandbag and is definitely a difficult lead given its unsual placement opportunities. The climb ascends a 40 foot hand crack that curves left off the desert floor. Located in the Echo Rocks Area, this climb receives near perfect sunlight during the day, has a two bolt summit anchor, and features a nice and easy walk-off. If planning to TR this climb, bring long slings to reach from the bolts out over the lip of the climb. While challenging and a bit of a physical struggle rather than an opportunity to practice smooth crack climbing skills, its position, its easy approach, and the bolts making for an ideal top rope for those unused to trad anchors, this climb warrants inclusion in the Bay Area Climbers' To Do List. Park in the Echo Cove Parking lot and hike towards the large Echo Rock. When you near the West End of Echo Rock, turn right and head out into the open expanse on a well worn trail. Eff Eight will be the prominent left slanting crack on a large boulder directly in front of you. To descend, use the easy walk off on climber's left.
Double Dip (5.6)

Double Dip seen on left side with the flake. Stitcher Quits is the prominent black streak on the right. This is Echo Rock, West Face, as seen from the parking lot approach.
Located on Echo Rock's North Face, this 110' sport climb ascends the right side of flake before cruising up the lower angled dome to a nice flat bench finish high off the desert floor. The climb is runout and the flake at its start can be protected with a single cam (#3 or #4) near its top. Ascend the outside of the flake (lieback) for the most straightforward experience. From there one move puts you to the second bolt (don't blow this clip (or fail to put in a cam behind the flake) or you will deck!) After the second bolt, the climbing is easy face climbing and offers quite a few positive holds to say its a slab. Its pure fun, although runout with only 5 bolts in 100' plus. A great alternative to the most popular (but usually crowded) Stitcher Quits (5.7) that ascends the prominent black dike to the right of Double Dip. There is a two bolt anchor. Descend the slabs to climber's left. Pretty classic climb for the grade and I highly recommend it!
Hidden Valley Campground
Hands Off (5.8)

Located inside Hidden Valley Campground, Hands Off (5.8), is a somewhat difficult 5.8that combines stemming, jamming, and some thrashing, to ascend this varied and fun route. Brings #4s for the anchor and smaller gear for the climb itself. To descend, walk off to climber's left down the backside on a somewhat steep slab. Curve back towards hidden Valley and downclimb to the base of the route. The downclimb is not too bad as far as Joshua Tree is concerned. This is a John Long FA and a very popular climb.
Beginner's Three (5.3)

Located on the backside of Intersection Rock, this low angle hand crack ascends a prominent buttress for 50'. Protection opportunities are available throughout, making this a good beginner's trad lead. It does however finish on a low angle slab that appears to have a crack in it when viewed from the ground, only to turn out to be a shallow streak that offers no protection. The angle is quite low here, but this should be known before leaving the ground to avoid the surprise a beginner would feel to suddenly be confronted with a lack of pro. The climb finishes on the shoulder of Intersection Rock below Overhang Bypass. Build an anchor in the horizontal crack that is positioned approx 10 feet from the lip of the climb. Downclimb off to climber's left (not too bad.)
Double Cross (5.8)
An absolute Joshua Tree classic. This 5.7+-5.8 route offers some of the best hand jamming I've ever seen. It is unfortunately the site of quite a few accidents probably owing to its 25' of essentially unprotected (but easy) face climbing before the start of the crack and due to its fame as a classic Joshua Tree solo. After the face moves, its 70' of beautiful and rythmic crack climbing. Rap anchors are to climber's right. Takes a standard rack with cams up to 3" with doubles (or triples) of #1s and #2s.
Quail Springs
Trashcan Rock, located just off Park Boulevard approximately 3 miles from the Park's Western entrance, this rock sees a lot of traffic from both guide groups and tourists given that it features a large parking area, picnic tables, and 5 second approaches. While not a remote wilderness setting, it does offer a lot of climbing in a short period of time given the availability of easy-to-moderate trad routes and moderate sport climbs.

1. The Trough (5.0) - A great, but short (20') beginner's trad line
2. Karpwitz (5.6) - A nice fun, trad line with varied movements
3. B-3 (5.3) - Trad, anchor in horizontal crack above.
4. Profundity (5.10c) - Sport. Thoughtful, fun moves on an inobvious line.
5. B-2 (5.3) - Trad. The least enjoyable of the 5.3 and below trad lines on the face.
6. Tiptoe (5.7+) - Sport. A great line that moves up a feldspar dike. First bolt is way off the ground though and should be (dare I say it!) stick clipped if possible.
7. B-1 (5.1) - Trad. Fun face moves on patina flakes compliment a few nice hand jams.
Lost Horse Area
Atlantis Wall

To reach the Atlantis Wall, turn off Park Boulevard onto the dirt road through the Lost Horse Area. Park at the last dirt pullout before the 'Service Only Road' sign. Hike in on a well worn trail along rock walls until you can turn left up and into a Canyon. There on your left will be the very popular and fun Atlantis Wall.
On the Atlantis Wall are a number of great beginner trad climbs that can also be toproped by walking up the easy gully on the backside (Class 2?). Trad anchors and long slings are necessary to rig ropes, but a number of large boulders atop the formation offer strong and easy to use anchor points.
In the photo above, left-to-right, are:
Solar Technology (5.6), Men with Cow's Heads (5.5), Wet Pigeon (5.8), and Taurus
(5.7). We found everyone of these climbs to be fantastic. They make for great beginner's leads given the shorter nature of the wall (50') and due to the plentiful protection opportunities throughout each climb.
Please let us know what you think of these routes and let us know if you have favorites you'd like us to include! Many thanks, Bay Area Climbing Staff!

Subscribe to:
Comments (Atom)